Sunday, June 05, 2022

Pinkfresh Hibiscus

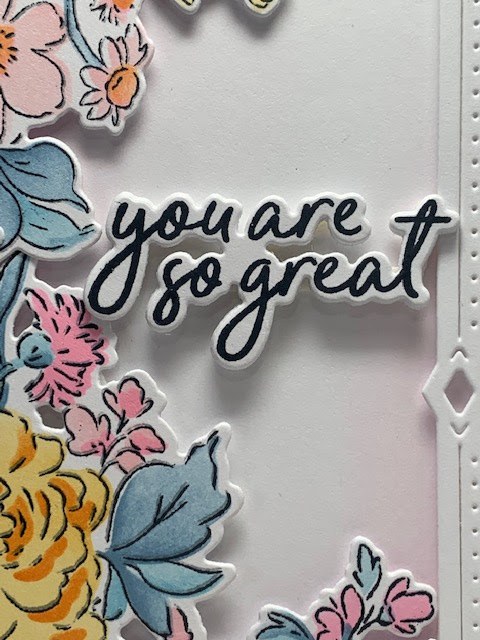
For today's card I used the Hibiscus stamps and dies from Pinkfresh Studio. I wasn't sure if I was going to even use all the elements in the set as there are so many, but I did actually use all the pieces and I like how it turned out. I thought it might look too busy, but it's flowers and leaves and how can nature look too busy, right? 

So I went with it and added two mats in coordinating colors. The background design is the basket weave stencil by My Favorite Things. I think it adds to the tropical feel of the hibiscus. 


I cut the sentiment in white cardstock then inked in the flower colors, stacked a few white ones then added one in black for a shadow effect against the colors of the flowers. It really made a difference rather than just the colored letters on their own. Then for even more pop, I covered it in glossy accents. 


With all the stacking and layering of the flower pieces, I felt the sentiment needed to be popped up and I do like the look of it. Hope you do too! Feel free to comment or email me with any questions. Thanks for looking. 


Product List:
Pinkfresh Studio, Hibiscus stamp
Pinkfresh Studio, Hibiscus die
Pinkfresh Studio, Hibiscus stencil set
Pinkfresh Studio, Clear iridescent drops *not currently available for purchase
Papertrey Ink, white cardstock
My Favorite Things ink cubes, ripe raspberry, razzleberry(r), orange fizz(r), daffodil, lemon chiffon, prickly pear, jellybean green
My Favorite Things, Basket weave stencil
My Favorite Things, Hello There word die set
My Favorite Things, black licorice cardstock
Tim Holtz Distress Inks, aged mahogany, crushed olive
Foam tape, glossy accents


Saturday, June 04, 2022

Pinkfresh Studio, Grant Yourself Grace

Today’s card features the new set, Grant Yourself Grace, from the newest Pinkfresh release. For these flowers I used inks by My Favorite Things, with just a couple of TH Distress Inks. These flowers might be my favorites so far. 

I mentioned in a previous post how purple has never been a favorite color of mine and that the Pinkfresh Event class may have changed my mind. Well, here it is again so you be the judge. LOL These vibrant purples are enhanced with a touch of super dark blue which really makes an impact, don't you think. And I love pairing it with yellow. Reminds me of the super cute little Johnny Jump-ups my mom had when I was a kid. 

The backdrop is dry embossing using the Pinkfresh Stained Glass hot foil plate, and the frame is the mini slimline rectangle frame die set (2 sizes) from the Create and Connect Event kit. This is currently not available for public purchase, but keep your eyes open over the next few releases as it may be included in some later release. These clear iridescent drops were also part of the event kit. 
I used white heat embossing on black cardstock for my "cheers" sentiment, and, of course, foam tape to lift the frame and pop up the flowers. 

Product List:
Pinkfresh Studio, Grant Yourself Grace stamp
Pinkfresh Studio, Grant Yourself Grace die
Pinkfresh Studio, Grant Yourself Grace layering stencils
Pinkfresh Studio, Stained Glass hot foil plate
Pinkfresh Studio, Mini Slimline Rectangle Frame die set *not currently available for purchase
Pinkfresh Studio, Clear iridescent drops *not currently available for purchase
Papertrey Ink, white cardstock
Honey Bee Stamps, Sip Sip Hooray stamps and dies (cheers)
My Favorite Things, ink cubes: lemon chiffon, daffodil, prickly pear, jellybean green, olive, boysenberry, after midnight
My Favorite Things, Basket weave stencil
Tim Holtz, Distress Ink, wilted violet
Foam tape, glossy accents, blending brushes, black cardstock scrap, white embossing powder

Friday, May 27, 2022

Pinkfresh Create and Connect Event 2022, Finale

Day 2
Class 5, Summer Blooms

Our last class for the event was Summer Blooms. This set does not include a stamp, but consists of layering stencils and a die. I have to admit, I was kind of lost, skipping what is usually the first step, stamping. But as you can see by the finished cards, it was pretty okay not having a stamp to start with. And our teacher Angela Simpson was so fun to work with.

For our first card we made used not just the Summer Blooms stencils and die, but also this super delicate gazebo die. This die could also be used as a birdcage or church, I think. With the right elements you can make it anything you want to really. Here's how we used it with this set. 

Behind the panel with the gazebo and foliage, we added a second panel dry embossed with Geo Arch hot foil plate.
Isn't it so cute. It makes it easy to add dimension to your card without foam tape too. Simply tuck the foliage, flowers, or whatever your element is, into the gazebo and and leave some out. Done. 
The sentiment is from the Foiled Sentiments pack that was part of the event kit. These are much larger than the first foiled sentiment pack.
Class 5, Card 2
This time we made a horizontal oriented mini slimline card using the Mini Slimline Frame dies, and heat embossed the sentiment in the center of the window. This sentiment is from the Heart Smiles sentiment stamp set from the kit. 
Love the iridescent clear drops in this kit. They will be used a lot on future projects you can be sure. 

Make n Take
For our extra credit project, we again used the gazebo die with the foliage but in a totally different, and extra cheerful way, inking each of the leaf sets in a different rainbow color. 
The foiled sentiment is another from the included pack... 

...and after I thought I was finished, I used Wink of Stella clear glitter pen on the sun for a little more blingy look.
Whew! And there you have it. A really, really full weekend of crafty goodness from Pinkfresh Studio. Let me tell you, I slept so well those two nights having to get up earlier than usual for class! It really wore me out truth be told. But I wouldn't trade it for anything. These virtual events are so much fun for me. There isn't anything local, so attending crops or conventions is not something I'm able to enjoy. 

What was your favorite card from the event? If you have any comments and/or questions on any of the products I used on any of these cards for the two day event, please don't hesitate to shoot me an email (link in sidebar). Also, if you require a response, include your email address in your email as it is hidden if sent directly from the blog link. 

Product list:
*These products, unless otherwise noted, are not currently available for purchase. They are part of the special event kit and may or may not be released at a later date. Keep watch in the Pinkfresh Studio store over the next few months for your favorites.
Pinkfresh Studio, Summer Blooms layering stencil set
Pinkfresh Studio, Summer Blooms die
Pinkfresh Studio, Gazebo die
Pinkfresh Studio, Geo Arch hot foil plate
Pinkfresh Studio, Mini Slimline Frame die set
Pinkfresh Studio, Iridescent Clear Drops
white cardstock, foam tape, gold embossing powder, Wink of Stella clear glitter pen, various ink colors and blending brushes


Thursday, May 26, 2022

Pinkfresh Create and Connect Event 2022, Day 2

Class 4, Day 2

Today's first class was watercolor using Handpicked Flowers stamps and dies. I am not highly into this medium, personally, but our teacher for this class, Manushree Mishra, a wonderful and talented teacher, was so patient with all of us complete beginners and took the time to teach us several techniques. Now, we had one class on watercoloring in the previous event too and I learned what I considered to be a lot for a beginner. We had a great teacher. This time I learned even more and was able to incorporate it into the card for class. While I was not at all thrilled (LOL) with my outcome, after setting it aside and looking at it again later, I'm actually pleased that I was able to use what I've been learning and have my flowers not all look like big blobs of color on the paper. It's a slow process - well, for me, anyway, and I admire those who are so good at using this artist medium. So, here is my watercoloring attempt for this class. 

This closer shot shows just how random watercolor can be and still look like something when you step back from it. To me, that was a huge step. And staying within the lines is really not necessary but the lines are helpful, particularly for newbies.
This shows the dimension achieved with foam tape. Maybe next class I'll learn how to make my painting look dimensional just with technique. But that sounds way far off to me. Foam tape it is! The sentiment here is also part of the event kit. It is a sentiment stamps set called Heart Smiles. 
Class 4, Card 2
Using the same stamp set, and this time with the stencils and a color palette outside my comfort zone, card 2 is a completely different look. I meant for one of the orange flowers to be blue, but missed it in the stencil so orange it is. The colors though, so pretty together. To achieve a more water color looking effect, I used a light gray ink to stamp my image and stenciled over it leaving less of any outlines. And for the background panel, I used the Pinkfresh Sparkling Diamonds cover plate, which is not part of the kit, so check the store for it. I hot foiled it in silver and I really like the look of it. 

With the silver foiled background, I used a silver foiled sentiment from the foiled sentiments pack we received in our previous event kit. You might be able to find that pack in the store. The iridescent clear gems are perfect in the centers of the silver stars. 
Of course dimension is achieved in lots of ways. Not just with the clear drops, but also stacking the flower bunch, and adding foam tape to pop the sentiment.
Make n Take
For our third card using the Handpicked Flowers we have achieved yet another different look. Flowers are so versatile and these are no exception. This time we used black ink to stamp them, then stenciled in ink. Again, using colors I don't typically choose (blue for the foliage, for example) we get a really fun look. 
The mini slimline frame die is popped up with foam tape and the large, one piece flower bunch is cut into the pieces and tucked up under the frame for lots of dimension and visual interest. The sentiment comes with this stamp set and has a coordinating die - which I love! Stacking the sentiment and adhering with foam tape is the best, right? And don't forget the bling. Iridescent drops added to the corners give a little sparkle to the finished card. 


Product list:
*These products, unless otherwise noted, are not currently available for purchase. They are part of the special event kit and may or may not be released at a later date. Keep watch in the Pinkfresh Studio store over the next few months for your favorites. 
Pinkfresh Studio, Handpicked Flowers stamp set
Pinkfresh Studio, Handpicked Flowers layering stencil set
Pinkfresh Studio, Handpicked Flowers die
Pinkfresh Studio, Mini Slimline Frame die set
Pinkfresh Studio, Iridescent Clear Drops
Pinkfresh Studio, Sparkling Diamonds hot foil plate *NOT part of the event kit, see store link above or availability
Pinkfresh Studio, Foiled Sentiments pack *NOT part of the event kit, see store link above for availability (good luck)
Pinkfresh Studio, Heart Smiles sentiment stamps (enjoy your special day)
Koi Water Colors Pocket Field Sketch Box paint set by Sakura, white cardstock, black cardstock, foam tape, white embossing powder, silver foil, various ink colors and blending brushes


Pinkfresh Create and Connect Event 2022, contd

Day 1
Class 3, Card 1

For this class we are using a set called Butterfly Garden. We also used the Ornate Circle die, however, this time we used only the center die which doesn't cut a whole window as it does when using both pieces of the die. Behind this panel, we dry embossed with the Geo Arch hot foil plate. 

This sentiment is not part of the event kit. 
Again, love the dimension!
Class 3, Card 2
For this card we heat embossed the images in gold and laid them on the card front as they are on the stamp itself. Sounds easy, doesn't it. Well, it wasn't as easy as it might seem, but a tip that might help you if you wanted to do this design is to keep the negative space from which you cut the pieces and place it over your card/panel. This way you can simply fit the pieces inside the cut outs like a puzzle. 
The sentiment I used here is from the previous event kit, gold foiled sentiment pack. 
Don't forget the bling! Iridescent clear drops from this event kit provide the perfect finishing touch.
Make n Take
What I like to call extra credit, here is the optional third card for the Butterfly Garden class. There are just 4 ink colors on this entire card, yet look how striking. The gold heat embossing really is lovely with these colors too. 

The sentiment is also part of this set and has coordinating dies. It is two separate pieces.
Lots of dimension and lots of gold embossing. I love that it shows up so well here. I do not love that I inked and heat embossed a hair that was across my stamp or ink pad. Thankfully it doesn't ruin the entire card.

Product list:
*These products, unless otherwise noted, are not currently available for purchase. They are part of the special event kit and may or may not be released at a later date. Keep watch in the Pinkfresh Studio store over the next few months for your favorites. 
Pinkfresh Studio, Butterfly Garden stamp set
Pinkfresh Studio, Butterfly Garden die
Pinkfresh Studio, Butterfly Garden stencil set
Pinkfresh Studio, Ornate circle die
Pinkfresh Studio, Geo Arch hot foil plate
Pinkfresh Studio, Mini Slimline Frame die set
Pinkfresh Studio, Iridescent Clear Drops
Pinkfresh Studio, Foiled Sentiments pack (you're in my thoughts) * NOT part of the event kit; see store link above for availability
Pinkfresh Studio, Perfect Sentiments stamps and dies (hello) *NOT part of the event kit; see store link above for availability
white cardstock, foam tape, gold embossing powder, various ink colors and blending brushes