Showing posts with label pumpkin patch. Show all posts

Thursday, November 04, 2010

Boo!

First, I apologize for the funky coloring in my scan - it happens when the lumpy parts stitch into the non-lumpy parts so I can't really do anything about that aside from not making lumpy projects, which is not going to happen. I love me some foam tape! LOL And now, on to this week's project.

This week I'm sharing a layout of my simple Halloween pumpkin. I like to do something different with my pumpkin every year, and this time, I decided to paint my pumpkin instead of carving it. I added black vinyl accents and a green wire to the stem, and there you have it. I love it.

I used the Cottage Cutz pumpkin trio and stamp set along with leaves and vine from the pumpkin patch die for my 3D embellishment.


Here I've used the scallop/dot edger and bling accents.

and for a little something extra, I used the bitsy little spider from the Cottage Cutz spooky fence to "hang" from the ribbon. I heat embossed him with clear powder to give him more texture and dimension after I added white to his eyes. He's barely visible in the photo of the whole layout, but he's there. :)

Have you started scrapping your Halloween pics yet? Thanksgiving is just around the corner!

Thursday, September 16, 2010

Let's go to the pumpkin patch!

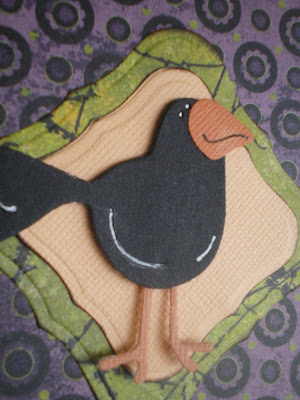
Nothing says fall like rows and rows and pumpkins, ready to be chosen by precious little hands that can barely pick them up. Joe and Regan had a blast with Aunt Cyndi at the pumpkin patch last fall. I couldn't resist doing another layout with the adorable Cottage Cutz pumpkin patch and crows dies. Below the large QK scallop border, I also used the Cottage Cutz scallop three edger. For the layered background behind the crow and sign post, I've used Spellbinders nesting dies. I think they really add pop and I love that they emboss as well as cut.


Love the Eerie Halloween paper collection by Basic Grey. My favorite Halloween color combination is purple and green. Can you see the embossed edge? I love that look.


Once again, I've used the letters that come on the die (pumpkin patch) to spell different words for my sign. Amazing how many words you can get from those few letters. This time, I cut the sign from cork paper which makes very realistic looking wood planks. Here you can see even better how the edge of the Spellbinders die can be embossed.


Layered pumpkins and sunflower vines make a fun pumpkin patch growing below and around the sign.


Thanks for looking!