
BIRTHDAY GIVE AWAY ALERT!
How would YOU like to be the LUCKY winner of this FABULOUS Project Life COMPLETE Scrapbook Kit BLUSH EDITION? Yep, Miss Emma had ordered an extra one to giveaway for this special day! ;) All you have to do is leave a comment at EACH stop in this hop. For additional entries, become a follower of this blog if you aren't already, and spread the word on facebook to all of YOUR friends! Once you do that, visit My Creative Time Facebook page HERE and let Emma know you did.
This is a FABULOUS prize!!
Good Luck!

***SALE ALERT***
In addition, for THIS WEEKEND ONLY, please use this code: BDAY42 at checkout to get 20% off your purchase! You can start shopping HERE! This sale will end at midnight Pacific Time on Sunday, May 12. As a birthday present from ME to all of YOU, I am giving away this ADORABLE stamp set with orders placed THIS WEEKEND ONLY! *$20 minimum order required to receive free stamp set.

***All orders from this sale will start shipping Monday, May 13th***
Emma's mom will be OFF and enjoying her Mother's Day weekend :)
What's a party without cupcakes, right!?? Isn't this a cute little mini party! I made a balloon flag "centerpiece" and cupcake topper flags. This was so much fun. The hubster loves it when I do 3D projects because they often times involve food, generally sweets, and he gets to eat them after I get all my blog pics. He enjoys it so much that if he questions anything "extra" that goes in the shopping cart on grocery day I just tell him "it's props" and he doesn't bat an eye. HAHAHA!! But I digress....let's get this party started, shall we. :)

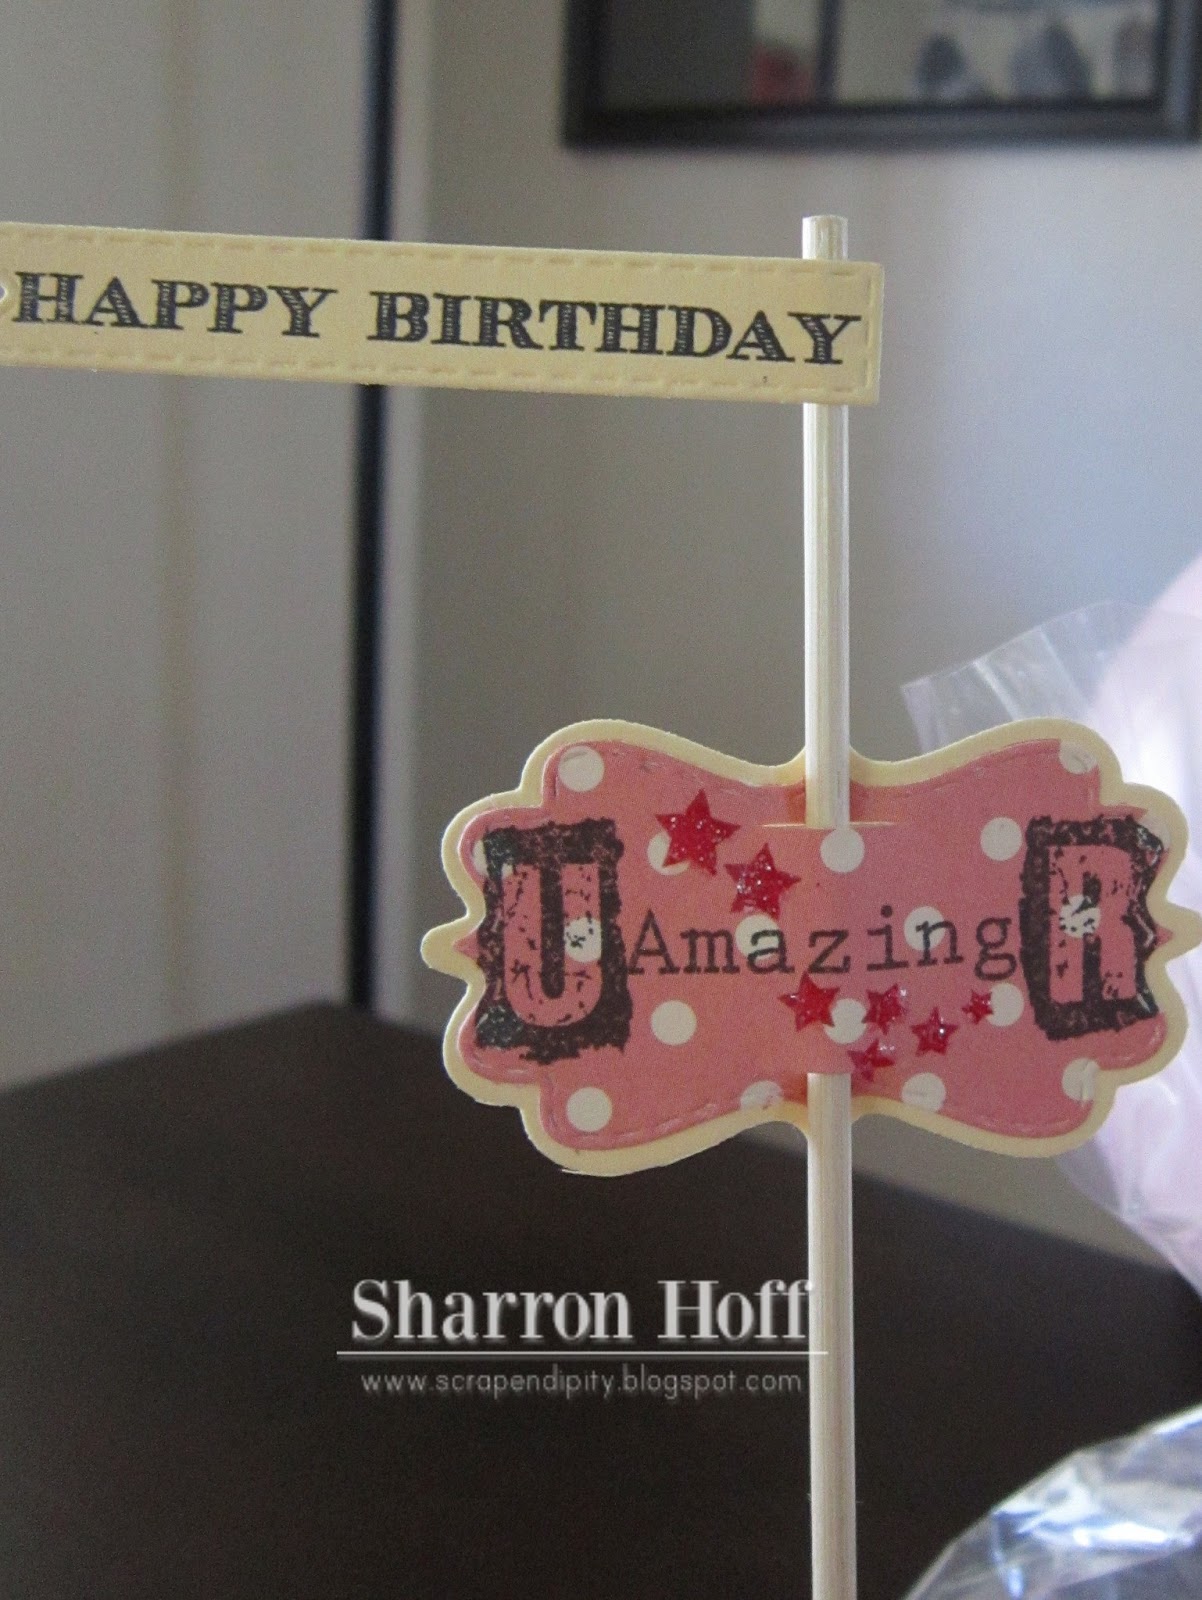
Happy Birthday flag using large tag die

Cupcake picks using Chocolate Greetings flag die, curly label die and stitched curly label die.


I love the idea of individual 'cakes' so I came up with this fun little idea for cupcakes. {Which I later saw on a baking blog and thought to myself how clever I am for doing this all on my own! LOL} This is great if you have a kids' party and have leftovers to send home. This makes it easier for transport without it getting too awfully squished along the way.

Gusset bag mini-tutorial:
Also, if you don't have gusset bags, you can easily make your own from flat bags. This works especially well with long bags as this will leave room for tying ribbon to close the top.
Add a piece of double sided tape along the bottom of the bag, on just one side, end to end. (fig 1)
fig 1

Remove the liner from the tape and fold up a couple of inches - the higher you fold, the bigger the bottom of the bag will be - press to adhere. (fig 2)
fig 2 

Open up the bag and flatten the bottom. (fig 3) It's not easy to see here as the bag is clear, but I've added arrows to the photo to show the bottom....hopefully that helps you 'get' how it will look.
fig 3 standing bag

And there you have it! If you aren't excited about this hop by now, I don't know what to do with you!! Hahaha!! If you started at the beginning you will have arrived here from Ruthie's blog are right on track. Up next is Tracy.
We also have a guest designer joining us today--our former teamie, Trell came to our party!! YAY! So happy to have you with us today, Mr. Trell!!
Blog hop line up:
Cassandra ~ http://www.ctimz3.blogspot.
Cathryn ~ http://inthepinkcathryn.
Cindy B. ~ http://www.cindybcreations.
Courtney ~ http://courtscrafts.
Leanne ~ http://createdbyleanne.
Micia ~ http://yellowbirdcreation.
Nancy ~ http://
Nikki ~ http://scrappinnavywife.
Rosy ~ http://
Ruthie ~ http://septemberninth.
Nancy ~ http://
Nikki ~ http://scrappinnavywife.
Rosy ~ http://
Ruthie ~ http://septemberninth.
YOU ARE HERE ~ Shar ~ http://scrapendipity.
Veronica ~ http://www.vkcreate.
Guest Designer Trell ~ http://polkadotsandpaint.blogspot.com/
Guest Designer Trell ~ http://polkadotsandpaint.blogspot.com/
Product List:
Dollar Store wedding and party supplies:
clear cups, clear shot glasses, curling ribbon, balloons, bamboo kabob skewers
My Creative Time dies:
large tag, curly label, stitched curly label, chocolate greetings flag
My Creative Time stamps:
Here's Lookin at You - stars from the necktie
More of My Favorite Sayings
It's All About You
We are Family - tiny heart
Celebrate Good Times
Other:
treat bags, ink, glossy accents, glitter, double sided tape, quickutz candle die, polka dot paper by October Afternoon

OMG!!!! Your mini party is ABSOLUTELY FABULOUS Miss Shar! Let me just say that I am TOTALLY serving cuppy cakes at my next party FOR sure because I am using this idea w/the cups! hehehe! LOVE LOVE LOVE!
ReplyDeleteBIG HUGE HUGS! ;)
Thank you so much for the tutorial!!! Love, love, love it!!
ReplyDeleteLove your projects they are so super cute!! I love when you guys leave tutorials!! I will have to try these for my birthday next week!!
ReplyDeleteTFS,
Bridget L
Nermaljuly14@gmail.com
I'm so loving this!! Everything turned out just fabulous!! TFS!
ReplyDeleteJess ;0)
Wow, your projects are beautiful! Thanks for the instructions for the bags, I will definitely try that.
ReplyDeleteLeslie
cascrapper at gmail dot com
This is so great!! I love your props :)
ReplyDeletehbisesi at comcast dot net
Wowzers! What fun projects. What awesome creative ideas put into these projects. Thanks for sharing the instructions for the bags.
ReplyDeleteDebbie H.
niteowlis@clear.net
Wow, what a beautiful project you did, thanks for all the inspiration.
ReplyDeleteWhat a fun party idea - love it all. Thanks for sharing.
ReplyDeleteStunning...
ReplyDeletedendearmas@aol.com
I would love, so much, to win this pkg. for my 22yo daughter. She has a 2yo of her own and has just let me know that she wants to start scrapbooking. I have been scrapbooking her life since the stone age, it seems. I would love to see her begin this way. XO
ReplyDeleteAWESOME looking birthday party ideas Shar!Hope you have a great weekend my friend!!!:)
ReplyDeleteWOW!!! You are definitely ready to PARTY. Awesomely cute cupcake embellishment and thanks for the tips (cupcake in cup and making a bag).
ReplyDeletethomasjeri55atyahoodotcom
Love it all!!! Super awesome job.
ReplyDeletehugs,jen
Okay, Miss Shar, this is absolutely adorable! Can I come to the party, please???
ReplyDeleteSuper party decorations here. Love how you made toppers from the dies. And the bags turned out perfect, I think. :)
ReplyDeleteLove the party decorations! Super cute!
ReplyDeleteOh Wow looks good enough to eat. You did an awesome job with all of your creations. My goodness what a talented gal you are!!
ReplyDeleteWow!! Awesome party stuff!! Looks too beautiful to eat!!
ReplyDeleteAwesome job!
ReplyDeleteWOW! Fabulous party decor!!!
ReplyDeleteWhat beautiful party decorations!
ReplyDeleteFabulous & Fun!!!Love your Birthday décor!!Awesome!!
ReplyDeleteHave a wonderful day,
Migdalia
♥ Crafting With Creative M ♥
♥ 2 Creative Chicks ♥
♥ Silhouette Challenges ♥
Wowee....what a F*U*N project!!! you know how to throw a party!
ReplyDeleteSherrie K
http://sherriescraps.blogspot.com
Wonderful idea :)
ReplyDeleteVicky
win_or_lose52@hotmail.com
Dollar store...really? Awesome! Looks expensive. Thanks for sharing!
ReplyDeleteApril
Wow these are all so cute. I love each little flag. TFS AJ-
ReplyDeleteGreat project! The cupcake picks are so pretty! Thank you for the bag tutorial :-)
ReplyDeleteqtme2003 at yahoo dot ca
Love all your picks! they are so cute:)
ReplyDeletewhat a fun and yummy table set-up you have created!!
ReplyDeleteSo cute. I love the whole theme. Such a cute idea.
ReplyDeleteThis party set ROCKS Shar!! You did a AWESOME job with it all! I wished I was there to eat the props those cupcakes look yummy! Hugs, Leanne
ReplyDeleteYour tags are so cute. I'm going to have to make some of
ReplyDeletemy own. Thanks for sharing.
wow!!!! that looks like so much fun!!!
ReplyDeletecandace
scrappin2littleprincesses.blogspot.com
OH MY!!! So festive. Thanks for the great tutorial!
ReplyDeletehattieshaven.blogspot.com
Very fun party projects and I like the story about your husband.
ReplyDeleteslrdowney at hotmail dot com
I totally relate to this! Great job on the sweet station, the Dollar Tree finds AND IT'S PINK!!! Whoot Whoot!! I love it all!
ReplyDeleteCute projects.
ReplyDeleteVery creative tags. Nice job....Marie
ReplyDeleteYou didn't miss a trick, embellishment,tag, etc. at all. This is the ultimate PARTY! Thanks for the tips and tutorial (I know I need all the help I can get)! Wonderful!!!
ReplyDeletemommaneff@yahoo.com
Great party projects, Shar!
ReplyDeleteTina
aurathentic@gmail.com
Very cute!!
ReplyDeleteAngela
chewiescrappin@hotmail.com
Shar ~ OMG!! Where do you want me to begin ~ if I start I won't be able to stop!! EEK! Everything and I mean EVERYTHING is simply AMAZING! There is NOT one detail you left out! WOW! That tutorial for the bags ~ Oh my LOVE! Then the cupcakes in the cups ~ ADORE that idea to pieces! Beautifully done!! What party magazine are you in ~ LOL! this should be imo!! Happy Mother's Day!
ReplyDeleteFantastic projects! Thanks for the tutorial!
ReplyDeleteWow what a beautiful birthday set you created. TFS.
ReplyDeleteD- dmcardmaker (AOL)
http://designsbydragonfly.blogspot.com
Lovely set of cards
ReplyDeleteWhat a lovely birthday table setting, Shar!
ReplyDeleteLoved the birthday table. Puts me to shame:). Thanks for the great ideas!
ReplyDeleteShar, your party looks fabulous! I want to come!! Great job! ~Hugs, Saundra
ReplyDeleteWhat a great idea for the cupcakes! Everything looks ready for a party it's beautiful! ~Robin
ReplyDeleteWOW I so want to got to your house right now. Everything looks AMAZING!!!
ReplyDeleteA pretty in pink party!!! I love this...super cute! And thanks for the tutorial on the flat bottom bag. Did not know you could do that! I'm going to try this myself. Thanks for the inspiration!
ReplyDeleteOMGoodness! This is terrific. Fantastic party!!! --C
ReplyDeleteLoved all the pretty decorations, the flags are so cute. Janet buck2@casscomm.com
ReplyDeleteWhat a lovely giveaway this is. I have thought of starting a project live, but just need a push. This could be it.
ReplyDeleteLove all of your decorations, that must have been some party! Also, I really enjoyed your post, very funny. Your hubster sounds like a great guy.
ReplyDeleteWOW!! Love the cupcakes in the glasses. Classy.
ReplyDeleteWOW Love it!! You did an awesome job as did the entire team! Very pretty! Cupcakes....YUMMMM my two favorite things crafting and cupcakes!
ReplyDeleteDeb C
Awesome job Shar! TFS
ReplyDeleteHave a wonderful day!
Liz O.
Unikebyyes at yahoo dot com
OH my goodness love the tags as a topper great idea. I want you to create my birthday decorations like this. Thanks
ReplyDeleteAwesome party decorations!!! Love the tags as a topper!!!
ReplyDeleteThanks for sharing your tutorial!! Such a GREAT idea and I am totally going to try that! Off to pin it as well :)
Love the skewers.
ReplyDeleteKristi
kidshomelove at yahoo dot com
Great job on this super Birthday party set up. Great banners and way to transport cupcakes :D Happy eating the props! I hope you had a wonderful Mother's Day!
ReplyDeletequilt 4 fun 2 at hot mail dot com
How fun! What a super sweet ensemble!!!
ReplyDeletehousesbuiltofcards@gmail.com
www.housesbuiltofcards.blogspot.com
Love, love, LOVE!!! I can't believe you did all this, just for the pics! Lucky hubby!
ReplyDeleteWOW!!! Now that looks like a party!!! I wanna come!! :)
ReplyDelete