
Today, at Dawn's request, I'm sharing how to make a gatefold card with handmade "wobbly" inside. Gatefold cards are not as difficult to make as they may look. They are actually pretty easy, and fun too. They're also fun to receive because they aren't your typical, ordinary folded in half card.
I like to use large sized dies for my cards, which makes it especially easy because the hard part is done for you if you want a shape other than a square or rectangle. Basically all you do is fold the paper and the rest of the fancy cutting is done by your cutter. I use a BigShot but you might have a Vagabond, Epic, Cuttlebug or something else. Easy enough, right!?
Ok, let's get started. First choose the shape you want to make your card. For this example, I've chosen a 5.25 inch scallop circle by Lifestyle Crafts. Notice I've also made sure I have an envelope that will fit my card. Sometimes I forget this step!
 Cut a piece of 12" cardstock for your card base, a little wider than the size of your die.

Score and fold your card at 3.5 inches from the left side and 3.25 inches from the right, for a 5.25 inch finished card.

Lay your folded cardstock over the die so that the folded edges are just inside the die (this will prevent the folds from being cut off), run through your cutter and it will look like this.


Now let's make the wobbly. It's easier than it looks, I promise. You will need 24 ga. wire and wire cutters, foam tape, a clear label (oops, not pictured) and a pencil or marker.

Start by cutting about a 9 inch piece of wire. Wrap the wire around the marker (I use my white pen).
Punch two 1 inch circles from the clear label and one circle from foam tape.

Now it starts to look complicated but it's not really. :) Cut a slit in each of the three circles.
This allows you to put the label "around" the wire so you can attach the wobbly to whatever it is you want to wobble.

Now using the foam circle, attach the free end of the wire in the same way. Before peeling off the backing, attach the second label circle to the back side of the foam circle so the sticky is covered.

Peel the backing from the foam tape and attach to your shape or whatever. Now make it wobble just for fun! :) Isn't it cool?!

Now finish your card. Here are some of the supplies I may use to finish mine.

and here it is finished.


The inside looks like this when you open the front flap.....

...and this is the bunny wobbly on the inside, under the second flap.

I hope you'll try this fun technique. Once you make one, you won't need the instructions. It's really quite simple. :) Have lots of wobbly fun!!!

 I heat embossed my sentiment with black so it is easily read. I love the look but need to perfect my technique a little more. LOL Other elements I used on my card include Spellbinders nesting lacy oval and nesting oval...
 I hope you've enjoy this project. I loved making it and look forward to working with all the talented ladies at My Creative Time and the great stamp designs created by Miss Emma herself! Thanks for coming by the studio today.


 Sweet birthday Tilda colored blonde for my birthday girl :) Bows for her pigtails are from the Cottage Cutz Mrs. Gnome die! I've embellished her party dress with fabric paint accents and added pretty bling to her cake.




 I also used the same layered technique with the flowers.


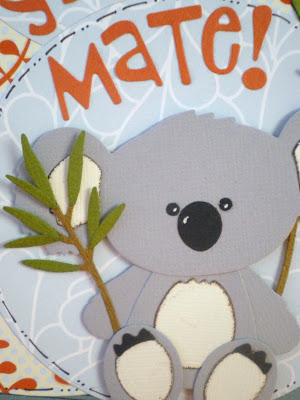
 I used the QK Sunshine mini font for my message. It looks very koala-ish to me. :)


 I attached roo with a springy wire to give her some real bounce.


 Cut a piece of 12" cardstock for your card base, a little wider than the size of your die.


 Now let's make the wobbly. It's easier than it looks, I promise. You will need 24 ga. wire and wire cutters, foam tape, a clear label (oops, not pictured) and a pencil or marker.

 Now it starts to look complicated but it's not really. :) Cut a slit in each of the three circles.
 Now using the foam circle, attach the free end of the wire in the same way. Before peeling off the backing, attach the second label circle to the back side of the foam circle so the sticky is covered.
  Peel the backing from the foam tape and attach to your shape or whatever. Now make it wobble just for fun! :) Isn't it cool?!
 Now finish your card. Here are some of the supplies I may use to finish mine.


 The inside looks like this when you open the front flap.....

