Thursday, January 31, 2013

MCT Thrifty Thursday

Welcome to a new feature with My Creative Time, Thrifty Thursday! Thursdays will be sort of a 'switch it up' day having something different each week. For today's thrifty theme, we are using scraps for our projects. I've used leftover scraps of October Afternoon for my 'li'l chickadee' card. 


Layering egg die and Color Me Happy stamp set by My Creative Time.

Cute chicken wire background stamp by My Creative Time. Love the "farmy" look to this one. So cute!

Product List:
My Creative Time, Color Me Happy stamp set
My Creative Time, Hello Spring, layering egg dies
My Creative Time, Spring Chicken wire background stamp
October Afternoon, Cherry Hill and Modern Homemaker paper scraps
Ink, button, twine

Wednesday, January 30, 2013

3D Wednesday time

Hello crafty peeps! It's hump day and you know what that means....it's time for another 3D Wednesday with My Creative Time. This week we were to make a box or container. I super love 3D Wednesday and I super love boxes and containers. LOL. Hope you like what I've created today!

Two of my projects are recycles. Another love! From one package of BigShot cutting plates (the regular size, not the extended ones) I was able to cut both this fry box and the tiny take out box. {"Awesome recycling", she said, as she patted herself on the back. ;)}


The fry box is close to a regular size container you would get at the fast food place. I really love this die (by Quickutz) and you can do so much with it. Party favors, mini Easter baskets, fry boxes {gasp! they really work for that too!} or chips while you watch the game...endless possibilities. I embellished this Valentine box using a lacy heart die (also Quickutz) adorned with various foliage and the super cute shrinky tag with the message, "you had me at chocolate", by My Creative Time.

This teensy take out box is so sweet. I love cutting it from clear material when your filling is as colorful as Valentine candy! Such a pretty presentation. Would be cute at Easter with jelly beans in it too.

Pretty little flower made with MCT scalloped circle die; shrinky heart from MCT stitched layered hearts and sentiment from MCT Lots of Love stamp set.

For my third container I've done another tiny take out box but used this fab pattern paper from the Carta Bella, Devoted 6x6 paper pad. Hearts again are MCT stitched layering hearts.

Flower embellishment made from flat blossoms; inked in TH Weathered Wood, add pearl center and leaves.

Product List:
My Creative Time, You Had Me At Chocolate stamp set
My Creative Time, Chocolate Greetings banner die
My Creative Time, Scallop circle die
My Creative Time, Stitched Layering Heart dies
My Creative Time, Lots of Love stamp set
Quickutz take out box die
Quickutz fry box die
Quickutz nesting heart doily dies
Carta Bella, Devoted 6x6 paper pad
Shrink film, staz-on ink, TH distress ink, leaf and foliage dies, bling, brads, recycled plastic packaging


Monday, January 28, 2013

Baby B's Big Pumpkin

Welcome to another Scrapping The Little Things Monday with My Creative Time. I've done a layout -- yay!!! first time in quite a while!!! -- of my sweet little niece, Brielle. Miss Adorable, isn't she. :) Remember you can click an image to see the full size views of the pics. Your eyes are not deceiving you; this who page is done in sepia/brown/and black tones. Except of course for the green leaves. 


Pattern papers are by My Mind's Eye. Love their Lost and Found Halloween papers - the monotone colors say perfectly vintage Halloween to me.

I mad these mini floral sprays using the same pattern papers. I really like these! Oh and the flourishes I was going to cover in kraft cardstock, but I didn't have too.....I just left them as is - they were cut from one of my cracker boxes. Gasp! Awesome how the non-color is perfect. LOL Can you see the super cute bat button in the top photo? Love!

Here's the other spray. I use simple circles to roll these flowers. I love that look as much as I love the ones that are all petal-ly and prissy.

Final embellishment is this fab crows and pumpkins piece cut from one of the pattern papers. I used the labels to make this stand out. I didn't want to cover it up it's so cool. I did add two mini hearts with a tiny bow and button to tie it into the overall theme. I used this fishtail tag for my date using MCT Just Simply Live alphabet/number stamps.

Thanks for looking! Be sure to check out the other designer blogs as well for some Smash Book and Project Life ideas! Happy Monday. :)

Product List:
My Creative Time, Rolled flower die
My Creative Time, Stitched layered heart dies
My Creative Time, Stitched XL Label and layer
My Creative Time, Just Simply Live alphabet stamps
My Minds Eye, Lost and Found Halloween, 6x6 paper pad
My Favorite Things, Fishtail tag dies
My Favorite Things, Leafy Flourish die

Martha Stewart punches
Various leaf dies, circle dies, bling, buttons, twine

Sunday, January 27, 2013

We go together :)

I hope you're enjoying your weekend and getting some crafty time in. :) Today I'm sharing the card I made for the latest Peachy Keen Challenge


The subtle background is peachy's large polka dot print stamp. The cloud, banner and large heart dies are all by Quickutz. For the darling faces, I chose two different expressions in two different sizes from the PK Everyday Character Face assortment; and for my sentiment, the new Veggie Sentiments ONE set. The sweet little stitched heart die is by My Creative Time.


I love dimension, so I made my banner pop with foam tape placed between four layers of banner die cuts.

Really fun and quick card. Hope you like. :) Thanks for visiting me on the weekend!

Product List:
Peachy Keen Stamps, PK-100 Large Polka Dot Print
Peachy Keen Stamps, PK-163 Veggies Sentiments ONE
Peachy Keep Stamps, PK-490 Everyday Character Face Asst.
My Creative Time, Stitched heart layering dies
Quickutz, Nesting heart dies
Quickutz, Nesting scalloped heart dies
Carta Bella, Devoted 6x6 paper pad
felt, ink, white pen, pebbles glass beads, bazzill textured cardstock, foam tape, glossy accents

Saturday, January 26, 2013

Happy birthday treats

Seriously beside myself at the thought of Grace turning 12 in a couple of weeks. She's been scrapping with me since she was 3 and has always been my crafty buddy as many of you know. :) Honestly, where does the time go!??? ....but enough whining! This project brings to mind a little story of our birthday girl. One time when she was about 4 she had been at her other grandparents' house. Unbeknownst to anyone at the time, she somehow came across her grandpa's stash of Hershey kisses. Now, Miss Grace is a chocolate LOVER like her mom. Well, every now and then her mom would find bits of Hershey foil here and there over a period of several days and couldn't figure out where they were coming from. Evidently Miss Grace had absconded with the aforementioned kisses and was enjoying them by herself without any mention of them to anyone! Hilarious!!

Here's a little goody I made for her using Jaded Blossom Birthday Candies circle stamps--which I won at the birthday blog hop for my friend Kate Cordero, btw :)-- and My Creative Time Chocolate Greetings candy die.

I started with a pineapple can. These pop top alteration ideas are so much fun.

Open the BOTTOM of the can, using a safety edge opener - the kind that removes the lid without cutting it.

Prepare your candies and make some crinkle paper stuffing. I used my Fiskar's paper crimper and ran 12 inch strips of paper through, cut it into 4 inch pieces then crumpled it in my hand. Worked great!

Wrap the can with a strip of paper -- for this can I needed a piece 11 inches x 1 3/4 inches. If you want to add any stamped design or personalization, do that before you wrap it around the can. Next, put the candies in the can - remember, you're loading it from the bottom. You want the candies to be what you see first when the top is pulled off, like they are in a little nest, so they go in first. Stuff the crinkle paper in the can; how much of this you need depends how many candies you've used and how full you want the can to be.

Next step is to adhere the bottom of the can back in place. This is not as difficult as it may seem. I simply used Glossy Accents and wrapped a few rubber bands around the can to hold it securely while it dried. Now make the top label and gift tag, and DONE. :)

For my label I used the Love Stings stamp set by Jaded Blossom. The bee is too cute and goes perfectly with the Happy B-Day sentiment, which I used as a border around the label. I used glossy accents on his wings and stickles on his stripes, added googly eyes and, for his antenna, used black heart gems. Super cute!

Thanks for coming by today. Happy weekend my crafty friends! ♥

Product List:
Jaded Blossom, Birthday Kisses stamp set
Jaded Blossom, Love Stings stamp set
My Creative Time, Build a Banner starburst die
My Creative Time, Chocolate Greetings candy die
My Mind's Eye, Lime Twist - Fly a Kite 6x6 paper pad
Stickles, glossy accents, googly eyes, bling, twine, ink, circle dies

Friday, January 25, 2013

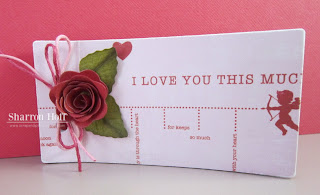
Blissful heart cut-out card

Just a super quick little card today. I had a few extras I hadn't used from other projects and made this simple little card and envelope using My Creative Time dies. And Hershey's Bliss Raspberry Meltaway candy. Mmmm! 


The scalloped heart I had cut from clear film and rubbed with Staz-on ink. I love how it looks with the scripty paper behind it. Then I cut out the center using another heart die, first making sure the size would fit over the yummy raspberry bliss candy I wanted to use.

I made the envelope using the fancy envelope die, folding again just inside the score lines to give it a wider opening to accommodate the thickness of the candy. Add the candy using a mini glue dot, and done!

Product List:
My Creative Time, Fancy Envelope die
My Creative Time, Stitched Scallop Heart die
Quickutz heart die
Staz-on ink, clear film


Thursday, January 24, 2013

MCT Designer Challenge

Designer Challenge feature is back! Today's challenge is brought to you by designer, Liz. She has challenged us to use 1 bow, 2 pattern papers, and 3 buttons. We would love it if you join us by linking up on the My Creative Time blog! Come on over and play with us. The more, the merrier!!!

For my project, I used this fab design by Lisa A. at the I'm in Haven blog. I saw her card on Pinterest and had to use it. I think the cutout design is very eye catching. It caught my eye, anyway.


Star dies by Quickutz. I ran them through the crimper for extra dimension and added interest, and used one different button to make it stand out even more.

Here are my two pattern papers. Sentiment is from the MCT Wow, So Many Candles stamp set; banner dies are Die-Namics by My Favorite Things. The background is not a pattern paper but a background stamp by Market Street Stamps, Bit of Burlap. Love that subtle design. It's perfect for masculine cards, I think.


Product List:
My Creative Time, Wow So Many Candles
My Favorite Things, Fish tail tags
Market Street Stamps, Bit of Burlap
Quickutz, nesting stars

Wednesday, January 23, 2013

3D Wednesday with MCT

Yay!! It's 3D Wednesday with My Creative Time. Today's assignment was to make a banner. I decided on a Valentine theme since I'm still in 'hearts and love' mode! Be sure to click an image to see larger views of the photos. They really don't do the pretty papers justice as they are. 

So, here is the full banner outstretched. I love the colors and patterns of this paper pad. It's Devoted by Carta Bella, 6x6 size. 


Can you see the teensy little heart on the blue ticket that says "you"? I cut this from the smallest of the stitched layering heart dies from shrink film. I love how it fit perfectly over one of the printed hearts on the paper. On the second heart I used the adorable hot air balloon and a "Fly Away With Me" sentiment. Embellished with two more of the layering hearts and prettied up with glossy accents. The cloud is cut from felt and stamped on directly.

 For this embellishment I used MCT rolled flower die, and the medium sized layered heart for another shrinky charm. Love the tulle bow with the heart charm in the center.

The largest of the hearts and the focal point of my banner. Love of course! :) Pink bling and pearls....so girlie and sweet. I love it.

Another fab embellishment using My Creative Time stamps and dies with shrink film. I used the stitched postage frame to make this bitsy little frame. You can barely see the tiny heart in the bottom right corner stamped with "xoxo". The flower is a new design I tried using the starburst die from the Build a Banner set. Cut in a spiral and rolled like the other flowers, it turned out so cute with the pointy petals.

Here I have used the banner die for my sentiment and tucked a pretty leafy flourish cut behind. I've added red bling to it but it's hard to see in this smaller version. The sweet little hearts on the banner are shiny with glossy accents. The last heart I stamped using more "xoxo" stamps from the newest release, in addition to more layered hearts. The shiny heart you see there is not bling but glossy accents.

Real quick, here is another treat container, and another use for the popular test tube box ... a lollipop holder! It's not very visible but for the "collar" on the lollipop I used the stitched scallop and circle dies. 


This adorable heart shaped sucker stamp is from the January peachy release. So cute! It's the perfect addition to my lollipop box. There are so many great stamps in that one set.

Love banner
Product List:
My Creative Time, stitched layering hearts
My Creative Time, Fly Away With Me sentiments
My Creative Time, Fly Away With Me hot air balloon die
My Creative Time, Rolled flower die
My Creative Time, Stitched postage frame
My Creative Time, Build a Banner starburst die
My Creative Time, Vintage banner die
My Creative Time, Lots of Love sentiments
Quickutz nesting heart dies
Various leaf dies
Carta Bella, Devoted 6x6 paper pad
Ink, tulle, ribbon, shrink film, pearls, bling, hemp twine


Lollipop holder
Product List:
Peachy Keen January release, PKSC-13
My Creative Time, Stitched scallop and circle dies
Echo Park, Love Story 6x6 paper pad
Martha Stewart lacy heart border punch
Copics, white pen, ink, baker's twine

Tuesday, January 22, 2013

Shrinky fun!

What can I say... I love Valentine's Day, I love making Valentines, I love My Creative Time's super cute Chocolate Greetings stamp and die set, and I love shrinky dink film so here you go! Super cute candy box. Oh yeah, I also love Lindor truffles. These are chocolate, which are good, but I'm not a huge lover of chocolate so my faves are the white chocolate ones. OH. YUM. But I digress.......

I used a test tube box idea in another new way. Instead of punch the hole in the top for the tube, I glued on a flower instead. Then I stapled a ribbon pull tab to the lid so it can be pulled up to open. Folded down the back part as it didn't need to be so tall without the tube in it, and put a truffle inside. It's the perfect size for one of these delectable goodies!


But here's the funnest part.....a shrinky dink chocolate drop and sweet little message!!! Can you stand it?! I used clear shrink film for the candy then covered it in brown stickles and white film for the message tag. Super easy to do -- just be sure to use Staz-on ink when you shrink.
Product List:
My Creative Time, You had me at Chocolate stamp set
My Creative Time, Chocolate Greetings stamp and die set
My Creative Time, Build a Banner kit, tag die
My Favorite Things, mini rolled flower die set
Echo Park, Love Story 6x6 pattern paper
Ink, ribbon, shrink film, stickles

Sunday, January 20, 2013

Valentine coupon book

Check out this super cute coupon book by My Favorite Things. The book is a set of two dies {cover and perforated coupon} which is adorable! Sold separately is a set of stamps that go with the coupons including a border and lots of 'coupon words' -- redeem, good for, coupon, etc. I love this! The paper I used for the cover is Carta Bella, Devoted 6x6 paper pad. The only stamps I used are those on the coupons inside the book. 

For my first project with this set I did this super quick Valentine book, but it can be done in any theme for any occasion. This super sweet little rolled flower is also a die by My Favorite Things.

 Here's a peek at the inside.

 And the back. See how simple it is to bind? Super cute!

Enjoy your weekend. :) Thanks for stopping by the studio!