Welcome to another new feature with the My Creative Time Design Team.

Today I did two projects. A super cute fall tree made from a lunch sack and these cute back to school treat containers from paper towels rolls. You can do this with toilet paper rolls or gift wrap rolls too if you want different sizes. I cut off about 3 inches for these.

The haunted tree...cute huh! I saw this idea on pintrest. Super simple and an easy one for the kids too! Here's the link for the super simple instructions. I used lots of leaves in fall colors to show off the tree and my back to school themed project.

The tree looks like it has dreads, doesn't it!? LOL

I've seen this pencil idea before and thought, how cute, I could do that. So I set to work. I didn't use any tutorial for this, I flew by the seat of my pants. There might be some tips on doing it easier than I did, but I'm satisfied with the finished product and since they are filled with candies and other goodies, the grands will love them too I'm sure.

For each pencil box you will need the following:
Cut 1 piece of yellow cardstock to fit the length of the tube you're using and long enough to wrap around the tube with overlap for gluing.
Cut 1 piece of pink cardstock the length of the yellow paper and about 2 inches wide.
Cut 1 piece of metallic paper the length of the yellow paper and about 1/2 inch wide.
Cut 1 tan and 1 pink circle about 2 1/2 inches {I forgot the large pink one so it's not shown in the photo}
Cut 1 pink circle about 1 3/4 inches
Cut 1 brown circle about 3/4 inch wide, for the lead

Adhere the gold strip to the yellow cardstock, then adhere the pink strip and trim the edges if necessary.

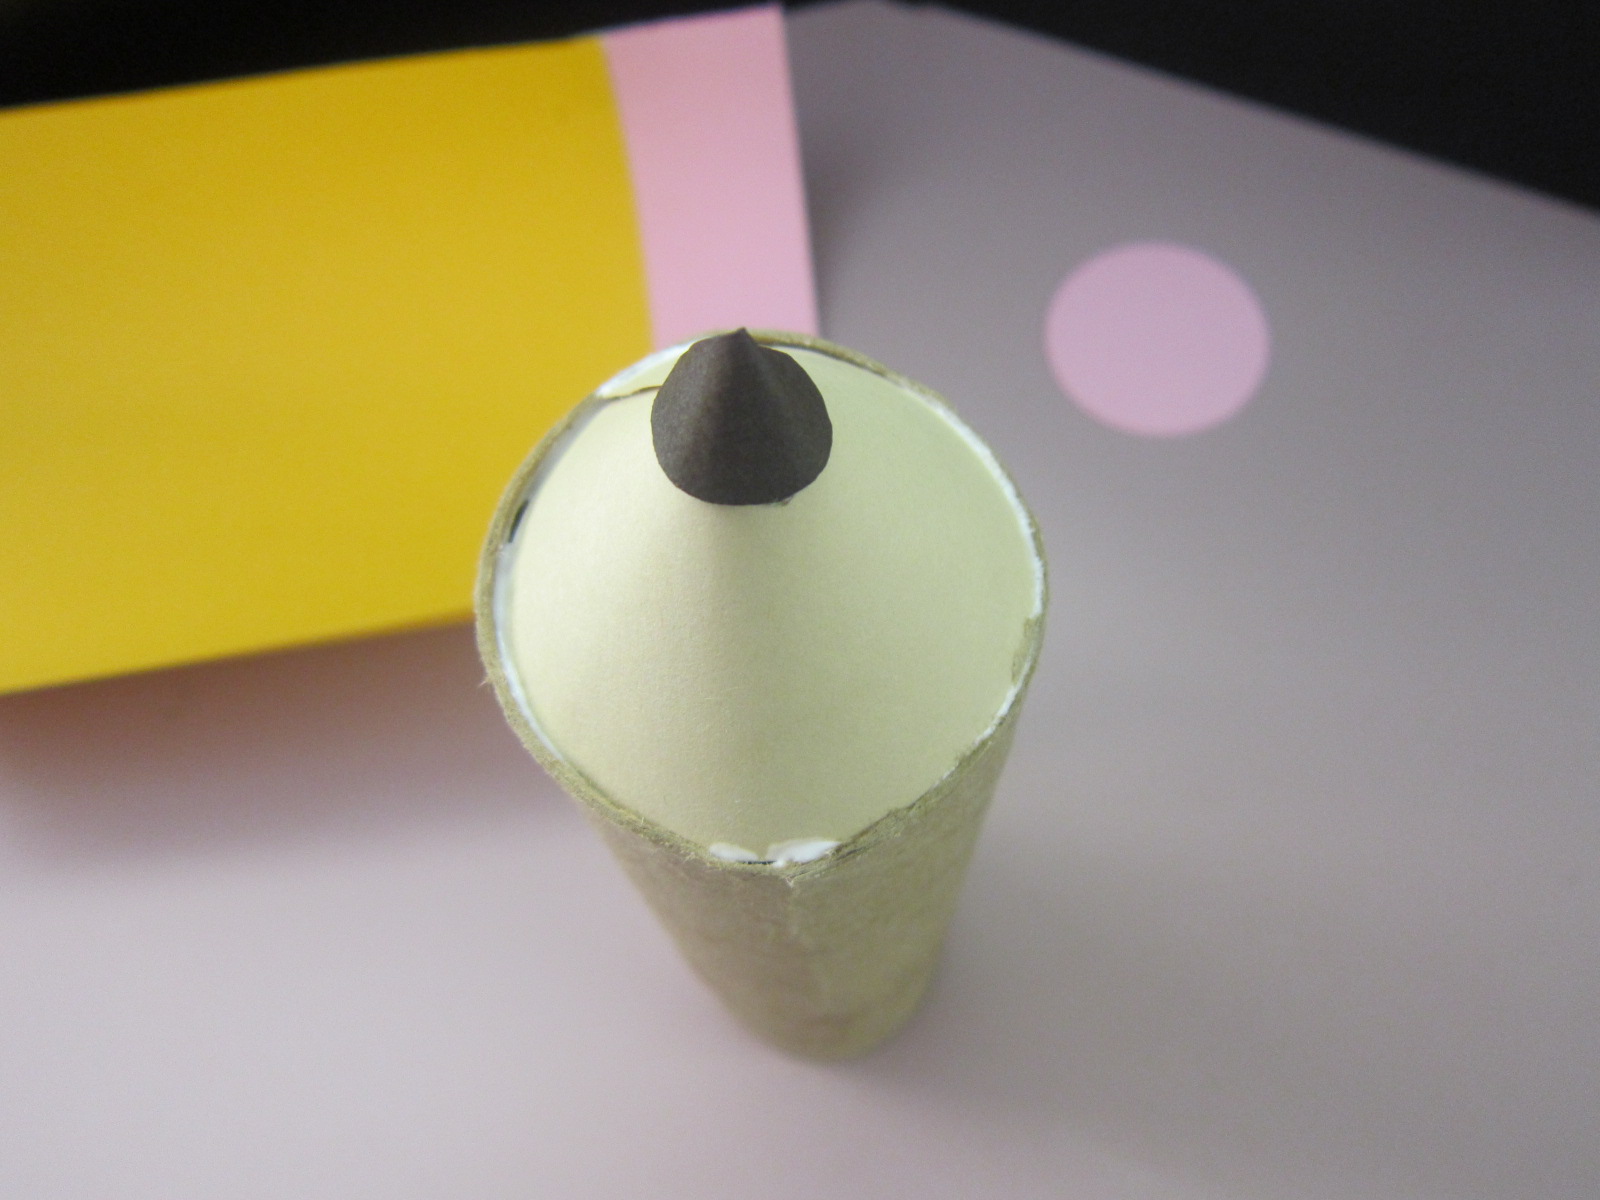
Cut the large tan circle to the center and roll in a cone shape the size of the tube and secure. Cut the small brown circle to the center and form a tiny cone that will fit the end of the large tan cone and secure it to the tan cone.


....and fit the cone inside so it's in the glue and let dry.
Cut the large pink circle to the center and roll in a cone shape the size of the tube and secure it closed. Glue the smaller pink circle inside the open end of the cone for the flat end of the pencil eraser. NOTE: Fill your tube with candy corn, peanuts, pencils, or other goodies at this point. When you have filled the tube, adhere the pink cone to the end but this time the point of the cone will go to the INSIDE of the tube with the small pink circle as the top of the eraser/flat end of the tube.

Add a tag if you wish. :)

Thanks for coming by today. If I have left out any steps or you need clarification on something, please comment and I'll get back to you as soon as I can! We hope you'll join us for this new challenge feature and link up on Emma's blog to be entered in the drawing. Show us what you can do with TRASH!
Product List:
Fall tree:
lunch sack, leaf die cuts
Pencil goody containers:
empty paper towel rolls
cardstock - yellow, pink, tan, dark brown and gold or silver metallic
My Creative Time All Around Everything stamp set
My Creative Time All Around Accessories stamp set
My Creative Time dies: leaves, scalloped circle, airplane banner, teeny tags, banner kit
Ruler ribbon, twine, ink

O wow can't believe that tree is just using a paper bag, how cool!! I have seen those pencils before but had no idea they were made out of toilet paper rolls or paper towel rolls, you learn something new everyday! Great job!
ReplyDeleteKristan
Eeek! These are both adorable, Shar! Fabulous ideas!
ReplyDeleteShar ~ JAW DROPPING!!!! OMG! Yes ~ I was screaming ~ sorry should have warned you to cover your ears! This is way too CUTE and CLEVER!!!! I MUST make these pencils!!! LOVE!! Oh the tree bag ~ oh how FABULOUS too! Yes ~ it does look like dreads! hehehe! Both ideas are amazing!!!
ReplyDeleteLOVE, LOVE, LOVE that "Rasta-fall-ian" tree! Fall is my favorite season, and even though it's still 90 degrees; I've been sporting my cozy clothes whenever I'm home. (I must have had my head in a paper sack, not to have thought of this project!)
ReplyDeleteAs for the "pencils"...so flippin' cute! I have a TON of leftover tubes from another project. I know what we're doing after school today! Thanks, Shar...my littlest one is a mini-me, and LOVES to craft!!!
Love the pencil! may have to try it. you are so nifty and clever. love it.
ReplyDeleteDreads!! Hee Hee!! LOVE the tree!! that is so cool! Im going to have to try that one! And the pencils are adorable!! Fantastic job!
ReplyDeleteTracy
WOW girl these are ADORABLE projects. How awesome!!!! Thanks so much for showing us these and how to make our own. PErfect project. hugs - Glora
ReplyDeleteGreat projects! I love your little tree...looks very artsy and a great place for the colorful leaves. Your treat boxes turned out so cute...They would make good decorations for a dorm room too.
ReplyDeletequilt 4 fun 2 at hot mail dot com
Shar... always coming up with most fabulous ideas! LOVE LOVE LOVE both of the projects. Simple yet creative on the fall tree. Also love the pencil idea for a teacher gift! Great Work!
ReplyDeleteMany Sweet Creations...
www.sweetdelightspapernmore.blogspot.com
WOW this project idea is just AWESOME Shar!Thanks so much for showing us how to make them,may have to try it!!!:)
ReplyDeleteWOW Shar!! How clever are these!!!! And that the tree!!! How cool would it be for Halloween!!! Awesome job!!!!!!!
ReplyDelete